


Overview
The Participatory filmmaking activity aims to provide an empowering tool for young people to voice their concerns, and propose solutions to biodiversity issues in their surroundings and communities.
By engaging around these issues together, possibly along with other members of the community, this activity has the potential to foster empathy and bridge different understandings on biodiversity issues through storytelling.
As the topic of the films is nature-related, creative processes in nature positively impact nature-connection, improving mental well-being of youth.
Learning objectives
This activity will teach students about the power, and responsibility, of filmmaking and telling stories together.
They will gain skills to co-produce short videos on environmental issues.
Through collaboration, students will hopefully learn how to listen to and consider different viewpoints on biodiversity issues.
Links with the other resources and duration
This activity works best after delivering at least two of the four available modules.
This way, students are informed about multiple biodiversity issues and can create a film about an issue that speaks to them the most, and is the most relevant within their contexts.
This activity is best suited as a whole-day workshop, or over two lessons, if students do the filming and editing as homework. However, it can also be done in one lesson, but that would exclude the creation of the videos and would focus on groups of students creating a storyline together.
We have also prepared another activity that delivers similar benefits, Photovoice, that is easier to use and requires less time to produce outputs.
Introduction
Participatory filmmaking refers to an approach where the subjects of a documentary film are actively involved in producing the film: from the initial idea of what story the film should tell, to filming and editing it.
Currently, this method is widely used among researchers as a research method, mostly within decolonial and critical scholarships, as well as by Non-Governmental Organisations (NGOs) and activists.
We would like to teach you how to use this tool to inspire students to tell their own stories - about biodiversity loss, climate change, or other social or environmental issues that worry them or impact their life and future, or of those around them.
The history of participatory filmmaking
Documentaries are films that are supposed to tell a factual, true story. However, depending on who tells the story, it can look quite different and stir different emotions in viewers.
Imagine if you had a fight with a friend and both sides were asked to film a video about the fight - it would look quite different.
But there doesn’t have to be conflict involved for this difference to emerge. People living in different places often have different ways of making sense of the world around them. The types of stories that people around the world would tell, and the way they would tell these stories, is quite different.
For example, a young person from Greenland might choose to tell a story about the changing sea ice sheets and how it affects their family’s way of life. It might be a story rooted in close observation of nature and deep cultural connection to the land. Their video might include long, quiet shots of the landscape, reflecting a worldview that values stillness, cycles, and interdependence.
Meanwhile, a young person living in London might focus on litter and air pollution in their neighbourhood, using fast-paced edits, music, and spoken word to express urgency and a call for action.
Each story reflects a different way of seeing and relating to the environment, shaped by culture, place, and lived experience. Both are equally valid and powerful. That’s the beauty of participatory filmmaking: it allows many ways of knowing the world to be seen and heard.
For a long time, back when cameras were very expensive and inaccessible, only certain people could tell stories through filmmaking. Within documentary filmmaking, these films showed real people but were controlled by outside filmmakers and their view of somebody else. The people who were being filmed didn’t have a say in how they would be portrayed.
However, in the 1960s, some filmmakers began to invite the people who were being filmed to co-create narratives and influence the story being told, setting the ground for participatory film.
In the context of decolonisation and the rise of post-colonial thought, participatory filmmaking started to be used in the Global South as a tool to enable local communities to tell their own stories, empowering them to showcase experiences and problems in their own way.
Within academia, this method allows for democratisation of research, allowing those being researched to influence how the film looks and what messages it sends, while generating knowledge about their perspectives and experiences (Lunch & Lunch, 2006).
As cameras became more accessible, participatory filmmaking became more widely adopted. Now it is used for research, within NGOs, as a tool for community engagement and advocacy.
With mobile phones, it is continuing to evolve and becoming a form of citizen media.
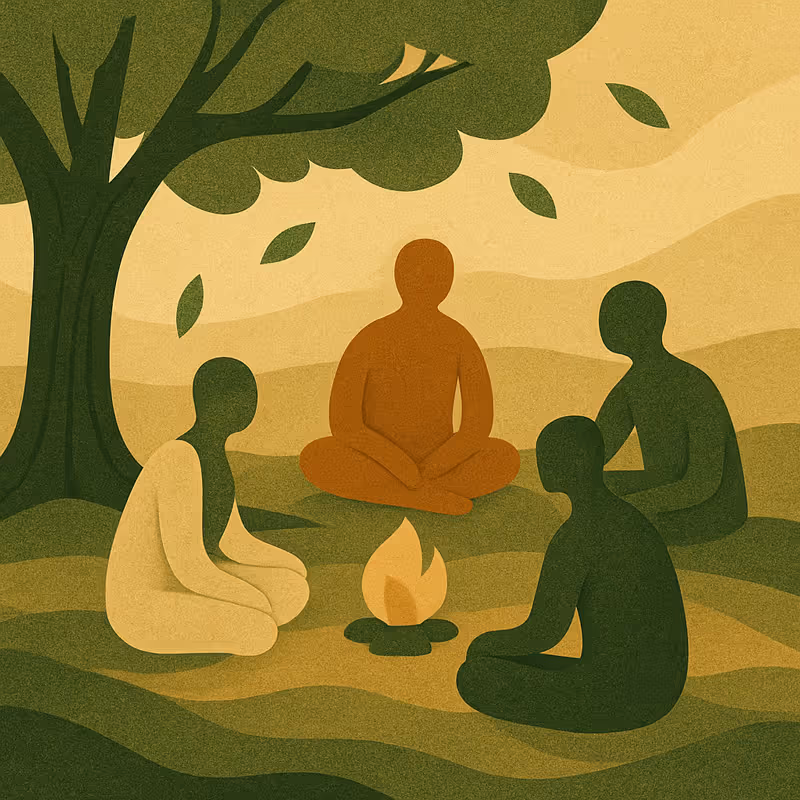
The power of participatory artistic creation
There is power when people come together to make something tangible. Participatory art creation can bridge divides, bring to the surface unheard voices and create empathy across differences. Co-creating stories is not an easy task - we all see and experience things differently but finding middle ground within these situations can help overcome differences.
Participatory filmmaking offers young people a chance to speak about what matters to them, especially in the face of biodiversity loss, but also to listen and understand others within their community. Students learn to see the world from different perspectives and find common ground in shared concerns about the environment.
This kind of creative expression can also offer a sense of relief and agency in moments of eco-anxiety. Art therapy is not new, and art has the potential to help young people process eco-anxiety and build emotional resilience by making space for imagination, collective reflection, and hope.
Artistic creation in nature also offers an opportunity for children and young people to reconnect with nature, which has positive impacts on mental health and well-being, while also fostering pro-environmental behaviours (Moula, Palmer, & Walshe, 2022).
Participatory filmmaking does more than document. It builds relationships, invites empathy, and helps young people navigate the complexity of environmental issues through co-creation rather than isolation.
We encourage you to help your students bring their stories to life through filmmaking. You could even organise a school screening where families and peers can listen to young people’s concerns and hopes. This kind of sharing can open new conversations, raise awareness, and remind students that their voices matter.
We hope you and your students enjoy the process and discover the creative power that lives in collective storytelling!
Materials
- Smartphones, or digital cameras
- Computer and cables for uploading films to the computer
- Participant consent forms
- Anyone that the students are taking a photo of should sign a consent form.
- To allow for public exhibiting of their photographs, signed consent forms by students, or by their parents / guardians if they are minors, are needed.
Guidelines
Time needed for the activity
It is important to note that even producing a short film can require a lot of time. However, with this activity, students can be given a task to produce a very short film about a biodiversity issue they care about or that they have noticed in their communities. Students should be encouraged to continue working on the film outside of class if they find it inspiring and interesting.
Ideally, you would spend a whole day producing a video for students to have a screening of their films by the end of the day. If you do use a whole day for this activity, it would be great if you could take your students to a natural space such as a park or school playground. Outside, students can spend around an hour shooting footage, quickly interviewing each other or other members of the community. When they get back into class, they would edit the footage they have, finishing by the end of the day to accommodate the screening.
Another option is to distribute this activity to multiple classes and give students the homework to make a short film. The first lesson can be the introduction and overview of what participatory film is, introducing the basics of how to make a film and set them the task of thinking of a story they would like to tell. Students can then form groups and make short films outside of the classroom. Another lesson can be the screening and discussion about the films they have made.
However, if time is limited, the lesson could simply introduce students to the technique, prompt students to think of a story that they would like to film and have a debrief at the end of the class. After the class, hopefully they feel empowered to use this tool in practice.
Note on ethics and permissions
Before filming, especially if students are interviewing others or filming in public, make sure you have the proper permissions in place. This will include:
- Signed consent forms from students or parents / guardians if working with minor students, for students to appear in or help create a film.
- Signed consent forms from anyone being filmed.
- Respect for privacy: if someone doesn’t want to be filmed, that must be respected without question. Make sure to draw students' attention to this.
- Remind students to think about how the people and places they’re filming are shown: stories should be honest and respectful, not harmful or mocking.
This can be a great moment to talk with students about the responsibility of telling real stories, and the care that comes with holding someone else’s voice on camera. You could ask students to discuss 'Whose story is this?' and 'How do we make sure it’s told fairly?'
Instructions on simple filming techniques
Within the technological age we live in, it is likely that you as a teacher will not have to do much in terms of teaching students how to use a camera. However, it is still good to cover a few basics of filmmaking that will help students learn how to produce a short film.
Here are the topics we suggest you cover:
1. How to find your story
Start with asking students: What worries you most about biodiversity loss? What change would you like to see in your community that would better accommodate co-existence of humans and other species?
Everyone can answer this individually, taking turns to speak, and form groups based on common answers. Alternatively, groups can be formed before and the whole group would have to find a common issue that worries them and to which they would like to dedicate their short film.
Encourage personal connection: The best stories are grounded in something you know or feel strongly about. This could be a park they love, their favourite species being at threat of extinction, floods they experienced, or anxiety about the future.
Once they have decided what story they want to tell, students can turn to thinking of how it should be told.
When students are drafting their story, they should use a simple story arc:
- Beginning: what’s the issue?
- Middle: who is affected and why?
- End: what’s being done / what do we hope for?
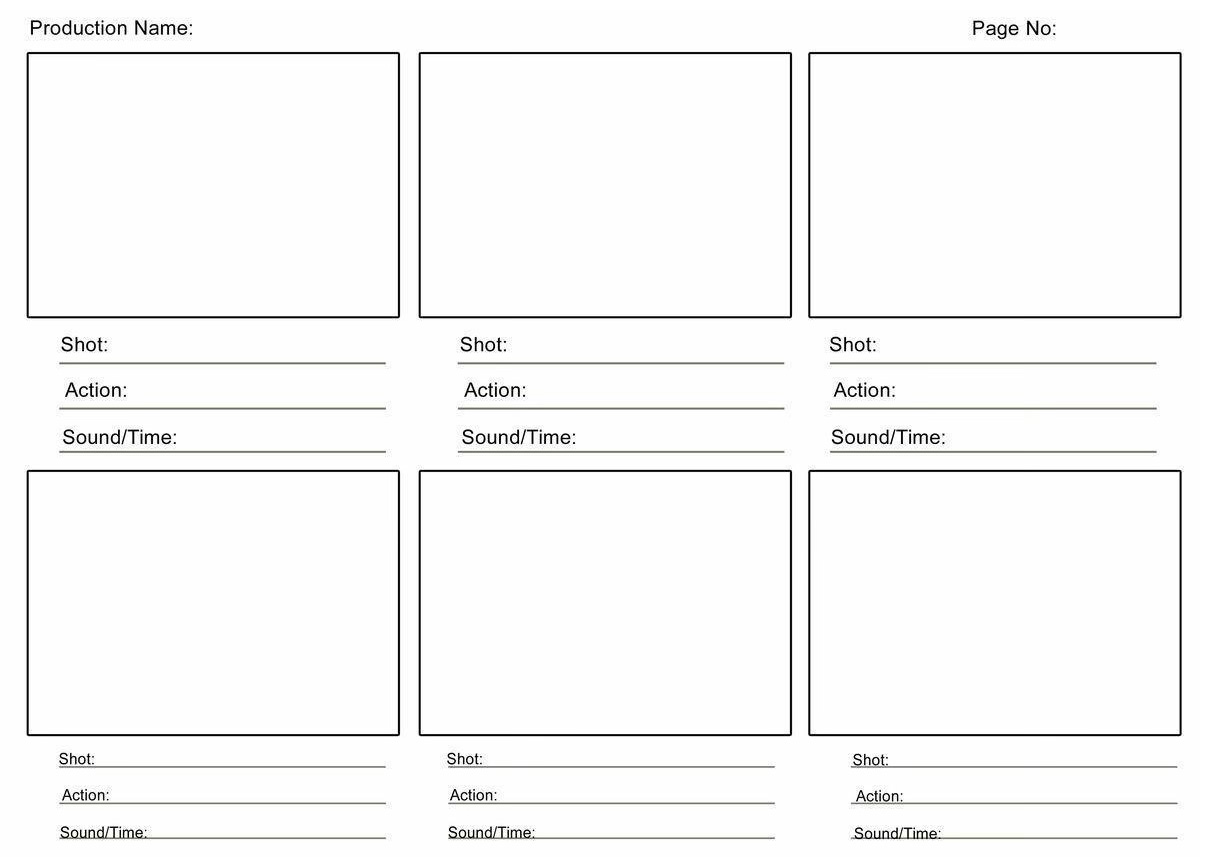
When thinking about stories, you can also print out and distribute storyboard templates to students, to help them plan how to tell their stories through filming shots. Remind students to think about the viewer when planning the film: What should they feel, learn, or do after watching the video?
If you are not planning for students to do the actual filming in-class, you can let them be a bit more ambitious on their storyboard. However, if the aim is to produce a short film within one day, keep reminding your students that they should keep the video simple, and that they can always continue filming outside of class as well.
2. Filming techniques
Framing: It is good to keep the same camera orientation throughout the film. Landscape is better if you think the film will be played on TV or computer screen. If you want to make a short film for social media, then filming in portrait is fine too.
Keep shots as steady as you can, trying not to move your camera abruptly when filming.
Think about what you want to include, or exclude, within your frame - play around with setting the scene.
Close-ups: Think how close or far you would like to be from the focus of what you are filming. This puts the audience's attention where you want it to go.
Lighting: Always film with light facing the subject, not behind them. Natural light works well. Check how the light looks before you start filming. If you are interviewing a person, you can ask them to move so that the light hits right. You can also play around with lighting - if it’s dark, you could use a torch to put a spotlight on the focus of the frame you are filming.
Sound: Film in quiet places when possible. If using a phone, keep it close to the speaker. It is advisable to use headphones that have a microphone to film sound, especially if it's windy or you are in a busy area. Always test the sound recording before you start interviewing someone.
B-roll: B-roll is extra footage showing the setting, people doing things, nature shots or similar things. It makes your film more interesting and provides you with material you can use with a voice-over.
For example, if you are speaking about a lake in your area that you love to go to, but you have noticed that it is becoming more and more polluted, you can record your voice and add it to footage of the lake and the polluted areas.
It can be nice to show details (e.g. water dripping from a pipe, someone’s hands planting seeds).
Scripting: Help students write simple bullet points of what they want to say. This should correspond to the storyboard that they have previously drafted, if used. Don’t over-rehearse but have a plan.
3. Engaging your audience and solutions journalism
Use solutions journalism: Encourage students to focus on how people are addressing environmental problems (e.g. a local clean-up, protecting trees, switching to bikes) as well.
Only speaking about what the problems are, and not thinking about how they can get solved, can foster a doom-and-gloom narrative, discouraging students from taking action. If there is no solution that has been taking shape so far, students can propose how they would like to see change happen.
Balance emotion and facts: Let interviewees speak from the heart but also include one or two key facts if possible.
4. Editing and sharing
There are apps out there made for beginners that are intuitive and easy-to-use.
We recommend the following apps: CapCut (free, works on both Apple and Android phones and laptops - a tutorial is available here), iMovie (for Apple users, a tutorial is available here) and YouCut (for Android users).
Cover the basics of editing with your students:
Import your clips
- Open your editing app and upload or drag in the videos you've recorded, including any B-roll footage you have filmed.
Trim your clips
- Cut out unnecessary or quiet parts at the beginning or end.
- Keep only what helps tell your story clearly and keeps it interesting.
Arrange your clips
- Move your trimmed clips into the order you want the story to unfold.
- Use transitions (like fades or cuts) to make it smooth, but don’t overdo it.
Add text and subtitles
- Introduce your topic with a short title (e.g. “Why We Care About Our River”).
- Add subtitles to improve accessibility and keep viewers engaged. Nowadays, there is usually an option to add subtitles automatically through AI.
Add background music or voiceover
- Choose calm, copyright-free music (most apps have built-in options). Make sure the music you use is copyright-free or royalty-free, options can be also found online.
- Keep volume low so voices can still be heard clearly.
Review and export
- Watch your film from start to finish. Fix anything unclear or shaky.
- Export your video in standard quality (720p or 1080p) and save it safely.
Debrief
Debriefing is a collective discussion method that can help students process and make sense of their thoughts and emotions and identify next steps for action in a safe space, following creative methods and interactive lessons.
As you know your students best, you can carefully think of questions, choose from the selection below or adapt the questions proposed according to the age and knowledge of your students.
You can also look at the instructions in the separate Debriefing activity to help you organise the debrief.
Debrief with screening
Use this version if you’re able to screen students’ videos together in class. Some timelines are suggested for each section of the debrief but accommodate them to your own class size and time availability.
1. Set the tone (5’)
- Let students know this is a space for respect, listening, and appreciation.
- Remind them that everyone shared something meaningful and personal.
2. Screening (20 – 30')
- Watch each film together.
- Optional: After each one, pause for a few seconds and ask students to note down a word or feeling the film evoked.
3. Group reflection (30’)
Lead discussions on a group reflection of the films you just viewed. You can use (some of) these discussion prompts:
- What stood out to you in one of the films?
- Did any film change how you see a local issue or someone in your community?
- What was the hardest part of making your video? What was the most rewarding?
- How did it feel to express your biodiversity or environmental concerns creatively?
- Did it help you feel more hopeful or more worried, or a mix of both?
4. Wrap-up and looking ahead (15’)
- Would you like to share your film with more people (parents, community, online)?
- What do you want others to feel or do after watching your film?
- What would you change or add if you had more time?
Debrief without screening
Use this version if you didn’t have time to watch the films together, they were completed outside of class, or if you just introduced participatory filmmaking to the students and they thought of a story to tell.
1. Individual reflection (10’)
Give students a few minutes to reflect quietly or write in their journals.
Prompts:
- What was the story about, and why did we choose that topic?
- What message or emotion did we want the viewer to take away?
- What did we learn by thinking through how we’d tell this story on film?
- How did it feel to imagine putting our voices and ideas into a video?
2. Students sharing their stories
Invite groups to share the stories they have taught of, inviting them to describe how they imagine the film would look.
3. Small group sharing (20’)
In pairs or groups that thought of their story together, have students discuss:
- What was the most interesting or challenging part of planning your video?
- Did someone else’s idea or topic make you think differently about biodiversity?
- What emotions came up while imagining your story: did it feel hopeful, sad, energising?
- If you were to film your story, what would you want people to feel or do after watching?
4. Whole class wrap-up (20’)
Use a few open questions:
- Do you think storytelling can help people understand each other better?
- Do you feel more motivated to talk about biodiversity loss or engage in protecting biodiversity?
- Do you think sharing your films would help get your voices heard? Does it have potential to trigger change in your community?